DIY Shower Kits: The Ultimate Guide
Home renovations are a big undertaking and need to be administered using high-quality materials. When it comes to showers, you don’t need to construct the entire thing from scratch, you can get a polished and sophisticated bathroom finish with a DIY shower kit. Here’s everything you need to know about these easily installed DIY shower kits.
What are DIY shower kits?
These are do-it-yourself shower units – or shower enclosure kits – which are pre-packaged shower components consisting of everything you need to assemble and install a shower unit. You can assemble and install them yourselves, or call on a professional for cost-effective where needed.
What do DIY shower kits include?
When you order a DIY shower kit, you will find everything you need for installation. While components may differ from one manufacturer to the next, here is a look at some of the common shower kit components.
- Showerhead: Responsible for delivering the water in the shower, these are available in various styles, including handheld, fixed mount, rain shower, or adjustable spray patterns.
- Shower Hose: If you opt for a handheld showerhead, then it will be accompanied by a flexible hose to connect to the water supply.
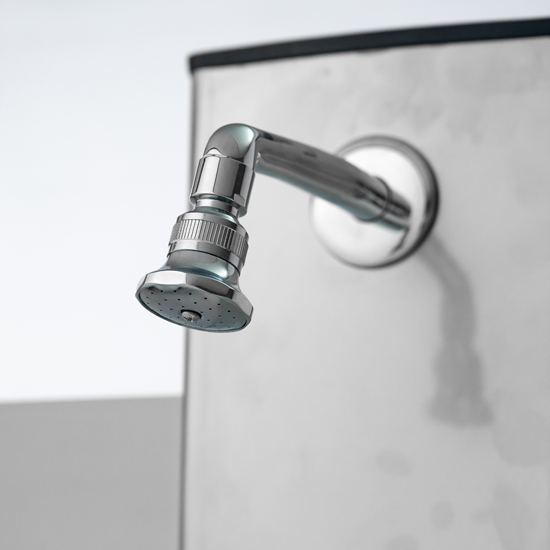
- Shower Arm: This is the metal pipe which attaches to the water supply, connecting to the showerhead. It will protrude either from the wall or ceiling.
- Shower Valve: This is the part of the shower which controls the flow of water, directing it to the showerhead. The shower valve is installed in the wall, connecting to the plumbing.
- Shower Faucet: This controls the pressure of water as well as the temperature, and is in the form of a knob or lever to easily adjust.
- Shower Trim: These are the decorative elements such as handles and faceplates that surround the shower faucet.
- Shower Enclosure: These are the walls, doors, or shower curtains that surround the shower, preventing water spills and providing privacy.
- Shower Base: This is the floor of the shower, made from acrylic, fibreglass, or tileable surfaces which are designed to drain the water.
- Drain Assembly: This is located at the bottom of the shower, allowing the water to flow out. This will include a drain cover, strainer, and pipes connected to the plumbing.
- Mounting Hardware: To assist you in securing the shower components, there will be mounting hardware such as screws, brackets, and anchors.
What are the types of DIY shower kits?
Different manufacturers will offer different types of DIY shower kits such as pre-fabricated acrylic or fiberglass units, tile-ready bases, and custom kits. Fibreglass showers are often a more affordable and durable option, while acrylic showers have more design flexibility and easier maintenance. Some examples of the different shower kits offered by GEZA include:
This is a white ABS/fibreglass shower tray with sides including waste and trap. It comes with PVC and aluminium shower sides and back which are fixed to the shower tray.
This is a white ABS/fibreglass shower tray with sides including waste and trap. There is thick PVC siding and a back panel which are fixed to the shower tray with aluminium.
This is a white ABS/fibreglass shower tray with sides as well as a waste and trap. The PVC and aluminium shower sides and back are fixed to the shower tray.
- Rectangular/Corner/Square Glass Shower Cubicle
This is a white ABS/fibreglass shower tray reinforced with a steel frame and legs. The glass shower side and back panels are framed in aluminium and fixed onto the tray. The corner model has a corner-side entry door.
What to consider when choosing DIY shower kits?
There are many considerations when choosing the right DIY shower kit for your needs. Here are some of the key factors to consider when choosing your kit.
- Spatial Requirements: When you’re installing a DIY shower kit, you need to ensure there is at least 75cm between the shower and other fixtures, with showers around 90×90 centimetres.
- Shower Accessibility: If you are working with limited space, rather opt for a curtain or hinged or track-style doors that don’t open out. This allows you to easily enter and exit the shower. The shower walls, base, and showerhead must be angled to prevent water leakage.
- Functional Forms: The DIY shower kit comes in a variety of shapes so you will need to consider the most functional form for your bathroom, whether it’s a corner, square, or rectangular unit.
- Budget: Your DIY shower budget will also determine the type of shower kit you’re going to choose. DIY shower kits are generally the more cost-effective option when compared with custom-built designs, but even within the range, there are different price tags.
- Waterproofing: You must ensure proper waterproofing to prevent any water leaks and damage. This requires following the manufacturer’s guidelines closely.
- Plumbing Connections: For a DIY shower kit, you need the correct plumbing so this could involve soldering pipes and installing a shower valve.
- Ventilation: As with any bathroom fixture, you will need adequate ventilation to prevent the growth of mould and mildew. A ventilation fan is an option if you don’t have sufficient windows.
- Permits: Different areas have different regulations regarding bathroom installations, so check that you comply with all the building codes and regulations before embarking on this particular project. It is vital for the safety and structural integrity of your home.
- Warranty: You must ensure your chosen DIY shower kit has a warranty and that the manufacturer provides you with follow-up and customer support. You might require installation assistance or aftercare support and a good manufacturer won’t hesitate to help.
Can I install a DIY shower kit?
Yes, the great thing about DIY shower kits is that you don’t require professional assistance, provided you have some level of DIY experience. Some installation tasks such as plumbing connections and waterproofing might require a higher level of DIY knowledge. However, if you’re confident in your skills and have the necessary tools, you can install the shower kit yourself.
What’s the ideal application for DIY shower kits?
DIY shower kits are incredibly versatile units, with applications varying in range depending on your bathroom needs. Here are some of the most ideal applications for DIY shower kits.
- Home Renovation
If you’re looking to update a bathroom in your home for improved functionality and aesthetics, but don’t want the added cost and hassle of a custom-build shower, then a DIY shower kit is ideal.
- Rental Properties
Even if you’re not going to be using the bathroom yourself, DIY shower kits are a great way to renovate a bathroom in a rental property, enhancing appeal for potential tenants and bringing in more rent.
- Upgrades on a Budget
DIY shower kits are a great way to enhance a home while remaining within budget. These units allow the more budget-conscious individuals to get an improved look without breaking the bank!
- DIY Enthusiasts
Some people thrive on DIY projects and DIY shower kits are a great project to challenge those skills for some real rewards.
- Quick Upgrades
DIY shower kits are the ideal solution for renovators who need to upgrade a bathroom within a limited timeframe. Custom-built designs require securing a contractor, which can be difficult last minute, whereas a DIY option can be done quickly and easily.
- Granny Flats
If you’re renovating or building a granny flat on your property, whether as a spare room, for family or to rent out for extra cash, then a DIY shower kit is ideal. It’s quick and easy to install, as well as great for maximising limited space.
- Large-Scale Developments
Developers who are constructing against a strict timeline should consider DIY shower kits as an efficient way to deliver quality products on time.
What is the maintenance and care of a DIY shower kit?
Another great thing about DIY shower kits is that they are easily cleaned and maintained. As with anything, the more regularly you clean it, the longer it will last. Just avoid using abrasive cleaners or rough scrubbing tools on any acrylic showers as these will scratch the surface. Here are some tips for cleaning the shower unit:
- Wipe and dry your DIY shower unit with a soft, dry towel daily to get rid of hard water deposits.
- Use glass cleaner on the shower glass, leave for a minute, and then use a paper towel to wipe the sprayed areas clean.
What is the cost of a DIY shower kit?
The prices for DIY shower kits vary quite a lot, but they remain much more cost-effective than custom-built showers as you’re saving on labour and material costs. You don’t need to individually source materials, of which there can be quite a number, and you’re able to install the DIY shower kit yourself.
What is the best DIY shower kit to install?
GEZA’s range of DIY shower kits are fully functional showers which can be installed within a few hours. These plug-in-and-play shower stalls are a complete shower solution, prefabricated to assemble and install without the mess, fuss and expense of a built and tiled shower. GEZA’s prefabricated shower cubicles feature hardened glass and aluminium hinged or sliding doors – quality materials designed to last. They are also available in a variety of styles on offer depending on space and aesthetic requirements.
To find out more, get in touch with GEZA today!